New VA Checklist
First Steps
We will go over the first basic steps of configuring your Virtual Airline.
It is only Day 1, so we will skip a lot and we will not cover every toggle, button and switch you encounter - we will introduce new features of vAMSYS to you as time goes on.
Do not rush, do not enable anything we don't ask you yet - trust us - it will make it easier for you in the beginning.
Your First Visit
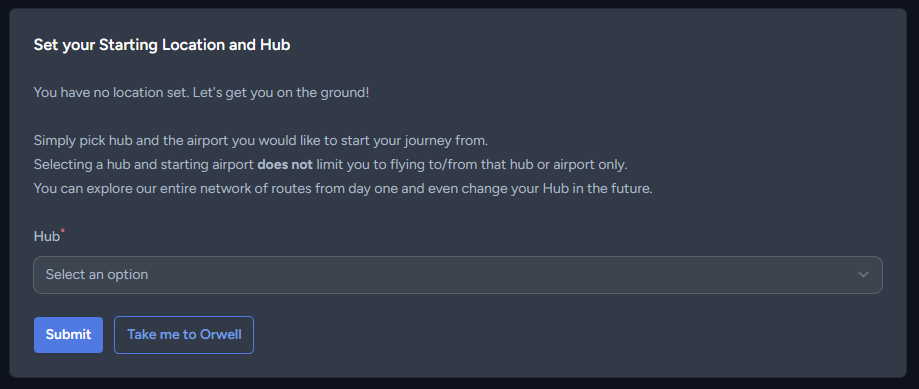
Upon logging into your VA on vAMSYS you will be presented with this popup 
This is a notification every pilot will see upon joining your Virtual Airline - it is prompting you to select your Hub and starting airport. We have covered the concept of Pilot Movement more in depth at the linked page - please have a read to understand how Pilot location works in vAMSYS.
We will get to setting up hubs another day - for now click the 'Take me to Orwell' button.
Orwell
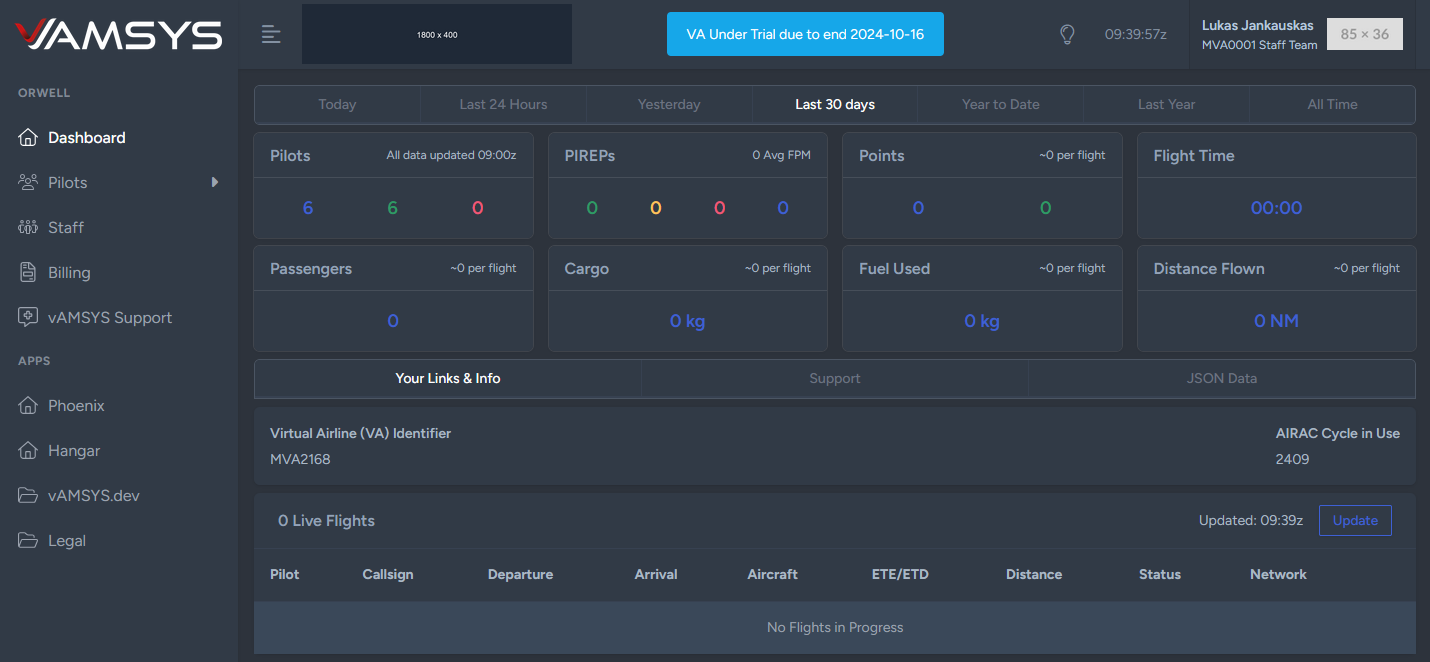
You should now be in Orwell Dashboard, where we will spend most of the day. 
Your Staff Permissions
Your Orwell Navigation menu looks a bit empty as VA Owners only have 2 special permissions no other member of your VA Staff does:
- Have access Billing Page
- Have access to Staff Page, irrespective of Manage Staff permission
Let's set you up with permissions we will need for Day 1 - navigate to Staff page in the menu.
In Staff Management and Permissions table you will see one row with your name on it. At the very end on the right hand side you will see ⋮ action menu. Click on it and select Edit. 
In the Edit modal which opens, please edit Basic Details section first.
- Title is required
- If you have - a Staff Email, Avatar Image and hidden flag as needed.
Stop
We know your first instinct is to enable all the switches and all the staff permissions. Please do not do that - it will lead you down dark and twisty road - stay on the path and follow this checklist.
Enable following permissions:
- Pilot Actions:
- Can View Pilot List
- Can Delete Pilot Profile
- Can Restore Pilots
- Can See Online Centre
- Settings:
- Can See Orwell - Settings menu
- Can Manage Airline Settings
- Can Manage Design Settings
- Others:
- Can Manage Ranks
- Can Manage Pages
- Can See Staff
- Can Manage Staff
Click Save changes and then press F5 or Command+R on your keyboard to reload vAMSYS with your new permissions.
Look and Feel
We will begin with the Design section.
Design -> Logo
Navigate to Design -> Logo and upload 4 logos for light and dark theme variations. We cover more details about Logos here.
Design -> Phoenix Dashboard
Navigate to Design -> Phoenix Dashboard and click 'Default Config' at the top. You are welcome to come back later and change how your Phoenix dashboard is laid out using this manual.
Design -> Social Icons
Here you may create Social Icons which will show in Phoenix Navigation under Community section.
Initial Custom Pages
Virtual Airline needs at least 1 custom Page. Click on 'Pages' option in Navigation.
In the 'Custom Pages' table, in the header, next to Create Page button, click ⋮ to open action menu and select 'Restore ACARS Page'.
This will create a stock Pegasus ACARS download page. You can edit it to see how it's made - it should serve as a good example on how pages are constructed.
Using that and Pages manual make other pages you may need - we consider starting with 'Rules' of your VA that Pilots need to follow.
Ranks
During creation of your Virtual Airline we created 2 ranks for you - an entry rank and Staff Team rank.
These ranks cannot be deleted; One of them is a 'regular' rank, the other - 'honorary' and is applied in addition to regular rank.
The Cadet rank will be the rank every pilot joining your VA will receive; Staff Team honorary rank, on the other hand, will be applied to every Staff Member in your VA.
Please edit these ranks as needed - provide an image or change a name. Using Rank Manual create more ranks as needed. We also provided example Epaulettes you can use.
Airline Settings
It is now time to head to Airline settings where we will put to use what you created already.
Navigate to Settings -> Airline.
General Settings
As noted when you applied for the VA - VA Name cannot be changed. Enter Slogan, Website, Register Link, Support Email etc as described in General Settings document. Do not enable any modules yet
Pilot Settings
Setup your Pilot Settings as described here
Rank & Transfer
This is where your created ranks will come into play. Before you set anything up - please read our Rank Transfers concept page which explains how rank transfers work in vAMSYS. Then, if you wish to enable Rank Transfer - follow instructions provided here.
Pilot Activity
Consider whether your VA wishes to enable activity requirements and remove inactive pilots. We described the settings here.
Booking Settings
This section has a lot of options - we describe then here; Regarding the jumpseat options - take a look at Pilot Movement concept page.
PIREPs
Last Section in the Airline Settings. As always - option descriptions are here.
Design -> Emails / Activity Emails
Now that you had a chance to go over initial settings, change your support email address, create some ranks and pages, perhaps enable activity requirements - it is time to configure some emails which will be sent to your pilots.
Navigate to Design -> Emails and Design -> Activity Emails
Depending on the settings you picked earlier, you will need to set up between 1 and 6 emails sent to your pilots.
Please follow the guides laid out here for registration emails and here for activity emails.
If the email subjects and contents are not set - these emails will not be sent to pilots.
Staff Team
To help with the next steps you may now invite remaining members of your team so they could lend a hand.
Due to public registrations disabled during trial period, you will have to use Invite feature to invite users to your Virtual Airline.
Use the documentation linked above to invite them; Once processed (5-10 minutes), proceed to Staff Page where you can click Create Staff and add them to your Staff roster.
Again - please pay attention to permissions and resist the urge to assign everything in one go - let the missing permissions be the guardrails from stepping off the path.
VDS
Whilst in the staff page, edit your permissions and grant yourself the following:
- Subsystem Access
- Can Access VDS
- VDS Settings
- Can Manage Aircraft
- Can Manage Airports
- Can Manage Airport Managers
- Can Manage Scenery
- Can Manage Stands
- Settings
- Can Manage VDS Settings
Click Save changes and then press F5 or Command+R on your keyboard to reload vAMSYS with your new permissions.
In the navigation menu you should see Settings -> VDS. Click on it.
We will focus on Airline Callsign Parameters section - in there you can add more parameters (callsign/flight number prefixes) your VA will use. Please note that not all parameters are available due to legacy agreements we have in place. If parameter is protected, you will not be able to use it during trial. You will be able to ask permission to use from the VA which holds rights to it after your trial ends.
VDS Dashboard
You are now in VDS Dashboard.
Airport Management -> Airports
Create 1 Airport using instructions provided. Do not add more than 1 airport just yet and do not worry about Managers and Load Management sections - leave them blank.
Airport Management -> Hubs
Create a Hub attached to the one airport you created - now when visiting Phoenix dashboard you will be able to select the hub and starting airport, making the modal we saw earlier disappear for good.
You can now see the pages and social icons you created for Phoenix; Take some time to review and edit as required.
Aircraft Management -> Fleets
This is our last item of focus today - Create all fleets your VA will be using.
Day 2
Take your time to review all the steps from today, tweak your emails, rank images, make sure you have all the fleets. Tomorrow - proceed to Day 2.